Getting motion vectors from your SPH simulation to your mesh
Here are a couple of little Softimage ICE compounds that I’ve found to be very useful over the last couple of months, when dealing with meshes generated from particle simulations.
In particular, I’ve been working with the great SPH solver from Thiago Costa and Grant Kot, which when used in conjunction with a mesher, such as Pwrapper can make some awfully cool, splashy fluids. Unfortunatly, Pwrapper lacks the vital ability to render correct 3D motion blur, nor can 2D motion vectors be generated from its meshes. I’ve also heard that meshes produced by RealFlow can suffer from broken motion vectors.
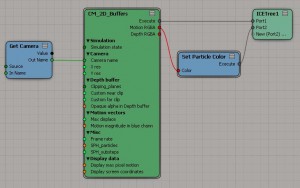
So, a simple solution is to generate our motion vectors on the particles themselves and to transfer this data to the resultant mesh as a renderable CAV attribute. All of this can be done with a few ICE nodes and wrapped up into these compounds:
(Right-click, save as, or drag and drop into XSI)
CM_2D_Buffers.xsicompound (v 1.76)
Color Attribute To CAV.xsicompound (v1.1)
CM_2D_Buffers
This compound generates the particle’s motion vectors by transforming them into the projection space of the input camera and calculating their instantaneous 2D velocity and rescaling into pixel space. Many thanks to Reinhard Claus, who some time ago made available the Screen info plugin for XSI. His methods were very helpful in resolving the peculiarities of XSI cameras.
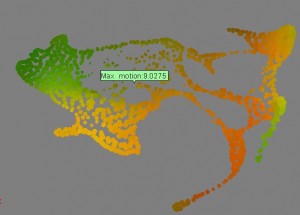
CM_2D_Buffers can be applied to simulated or non-simulated (e.g. cached) particles, so set the simulation state accordingly in the PPG. This compound was designed for use with SPH simulations in mind, so SPH mode is enabled by default. Since SPH uses a different integration method than regular particles, we need to know the frame rate and SPH substeps from the simulation to get correct vectors. Otherwise, the setup is just like any motion vector shader e.g. those that come with XSI (as a free bonus of working with the camera projections, we can also get a particle depth map (do with it as you will). Remember, it’s helpful though not always necessary, to set the maximum displacement based on the maximum pixel motion display property.
Getting the vectors onto the mesh
Unfortunately, we can’t simply calculate the motion vectors for the points on the Pwrapper mesh. Since the mesh point order is constantly changing, it would not be valid to compare the position of any point index from one frame to the next.
The easiest workaround is to transfer the RGB motion vectors from the nearest particle(s) to the mesh, where the data can be written to a CAV map. If desired, the sampled color attribute can be smoothed, by increasing the number of particle sample points.
Now that we have a CAV map, the vectors can easily be brought into the render tree and written to a custom buffer come render time.
Links:
ICE SPH on Vimeo
RE:Vision Effects on motion vectors
3D projection – Wikipedia
Pwrapper


